Configuring and Starting a Session
Now that the Inspector is installed (if necessary) and opened, you should be greeted with a screen like this:
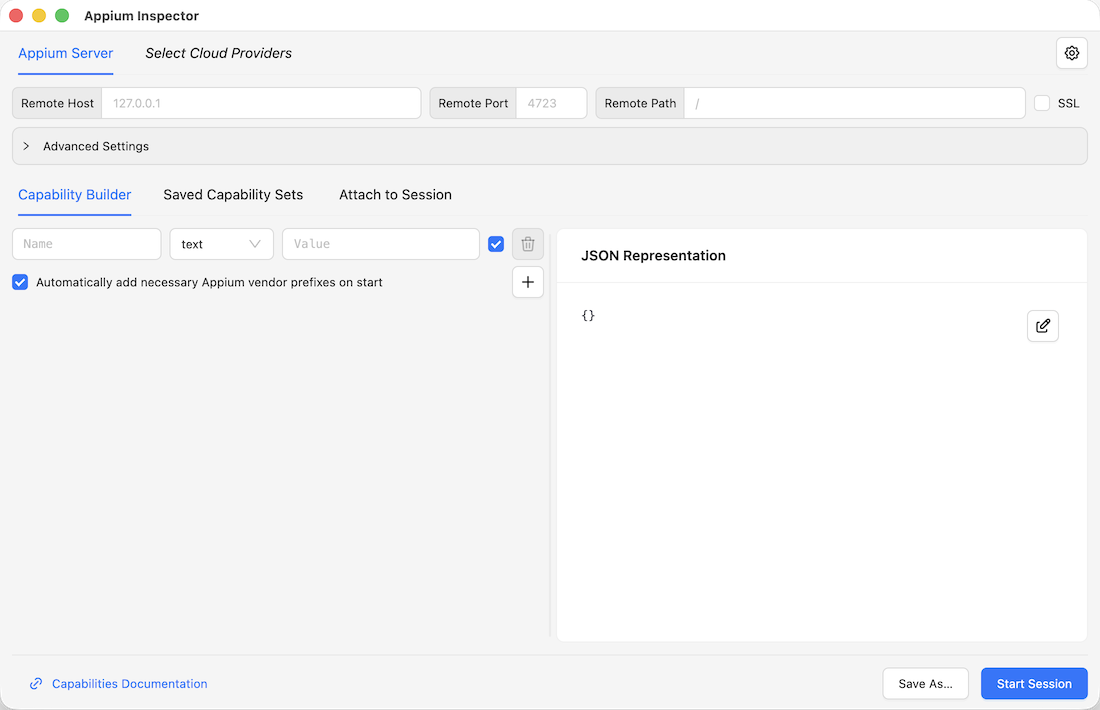
This is the Session Builder screen, where the server and session details are specified.
Adding Server Details

The server details section at the top of the window is where information about the Appium server is specified, so that the Inspector knows how to connect to it:
-
If you wish to connect to a cloud provider service, choose your vendor using the Select Cloud Providers button, switch to its tab, and fill in the required details.
-
If you wish to connect to a standalone local or remote Appium server, first make sure the server is launched and running. The start of the server log will have a list of IP addresses and ports that can be used to connect to the server.
-
For a local Appium server running on its default port, all server details fields can be left unchanged. By default, the Inspector will attempt to connect to
http://127.0.0.1:4723, which matches the default values of the Appium server. -
For a local or remote Appium server with non-default properties, please change the field values accordingly.
-
With the server details specified, you can move on to the session details!
Adding Session Details
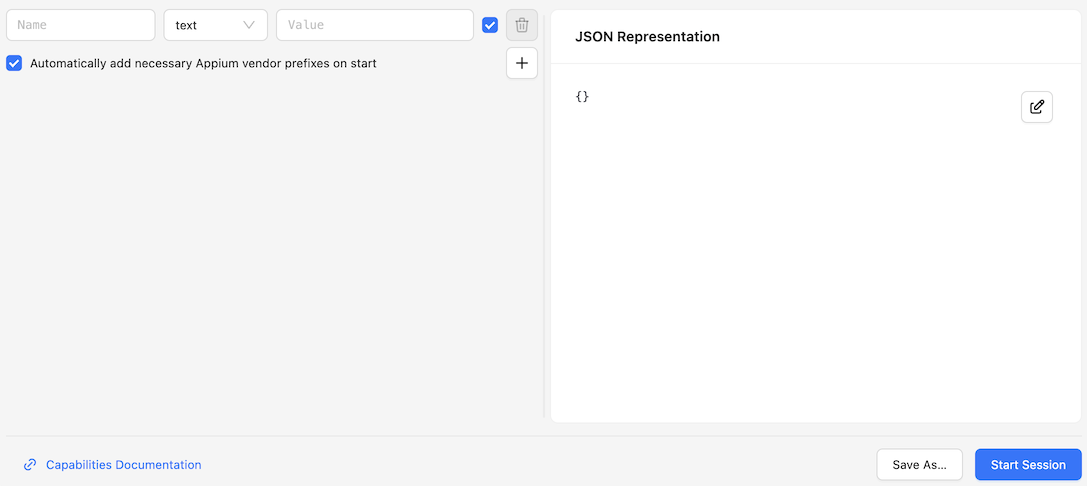
The Capability Builder take up the majority of the Session Builder screen. This is the place where your session Capabilities should be specified.
Warning
Appium has several mandatory capabilities (see above link). Attempting to start a new session without any capabilities will not work.
There are multiple ways to set the session capabilities:
- Enter them one by one on the left side
- Edit the whole capability set in JSON format on the right
- Import capabilities from an
.appiumsessionfile in the Saved Capability Sets tab - Apply one of the built-in capability templates in the Saved Capability Sets tab
You may also want to consult the documentation of your target driver, which should provide a list of all its supported capabilities, as well as some basic examples.
Once the capabilities are set, the session can be launched!
Launching the Session
For a final check, here is an example image of a Session Builder with fully configured server and session information:
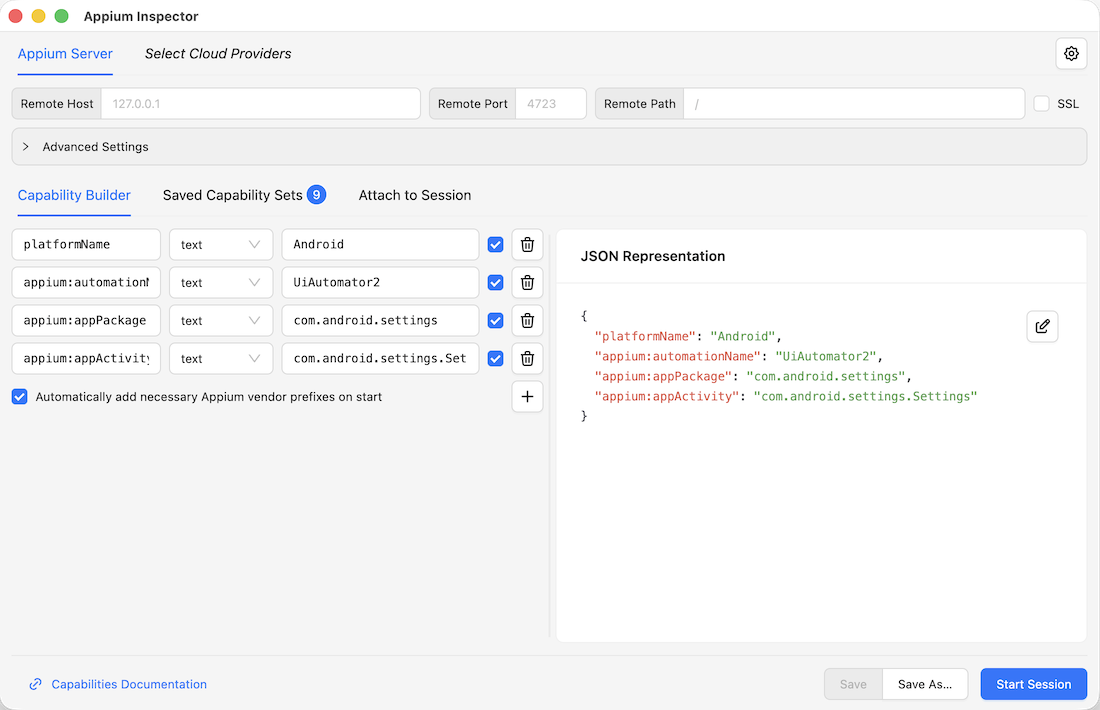
You can see the following details:
- The server details are unchanged, which means the Inspector will try to connect to a local Appium server on its default port
- The session capabilities are set to use the UiAutomator2 driver, with additional capabilities for the Android system settings app
Of course, your own server and session details will likely vary.
You can now press the blue Start Session button - hopefully your session will be created, in which case the Session Inspector screen will open:
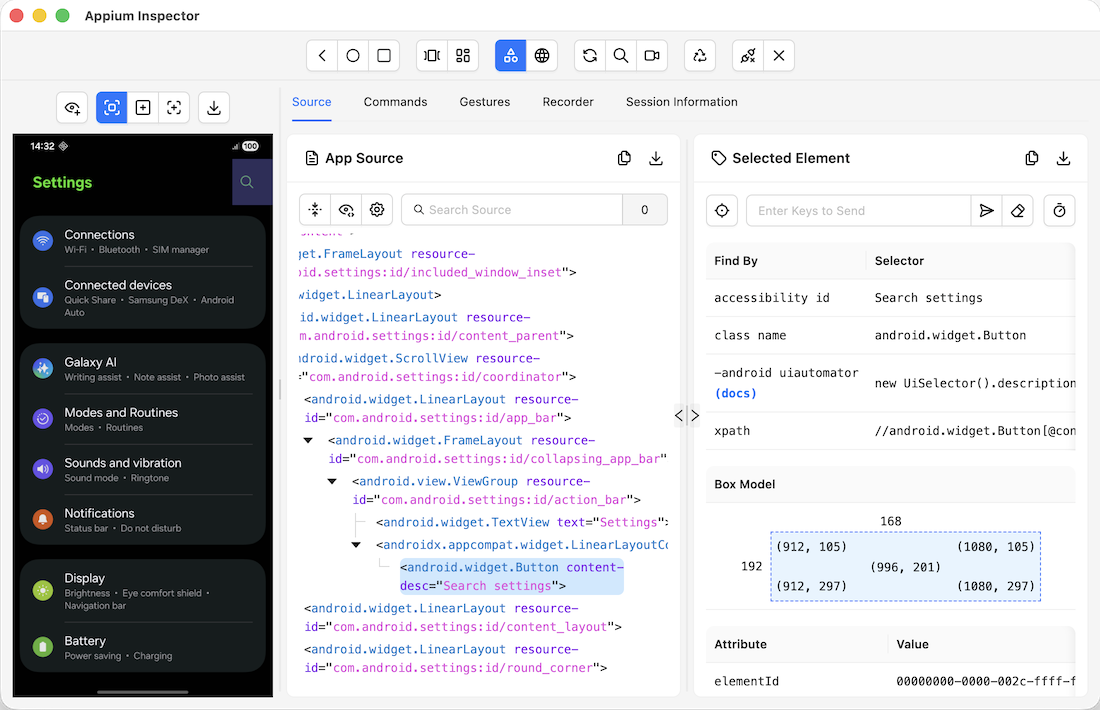
If this works, you are done with the quickstart! You can now start exploring your app using the various features described in the Session Inspector page.
If something went wrong, please check the Troubleshooting page for potential issues.